Sunday, November 14, 2010

Gobble

I don’t have very many Thanksgiving decorations. 

I was so excited to make this at our last craft night.


090


085  086

087 

The letters are made out of 2”” thick wood.  They stand up so easily. 

The Turkey is made out of a dried gourd. 

Thursday, September 9, 2010

New Adventure


I’m working on a new store with my sister-in-law.  We will sell handcrafted home decor along with unfinished items you can make yourself.  My brother owns a cabinet shop, so this is the perfect place to set up shop.  We will be selling online and locally.

http://www.thecraftdepot.blogspot.com/


We have fun give a ways and great decorating ideas.  Become a follower over there too!~

I’ll still be posting to this blog all of my personal projects and tutorials.  I’m working on another headboard bench, and this one is more beautiful than the last!

Sunday, August 1, 2010

Kitchen Update


019
My first blog post was my $75 kitchen remodel.   It has been missing something, and I finally figured it out when I saw this post from Missy at Little Green Bean.  It needed another window.

014

I have a stack of old windows that I’ve been dying to use.

002
I cleaned it up and painted it my favorite red color.

015

I bought some chains from Home Depot and screwed it in the ceiling.  Super Easy!

013


I ABSOLUTLY love how it turned out.  And it has officially taken place of my favorite project so far this year.  Sorry porch bench, but I still love you!

020

I bought some things at the DI to decorate with and wrapped it with grape vine.  LOVING IT!

009

While finding items to decorate with, I found this old tea pot and spray painted it red and put it above my cupboards along with this great crate.

023

016
One more picture to admire!

Thursday, July 29, 2010

Porch Bench


This has been one of my most favorite projects this year! I absolutely love how this bench turned out.


The even better thing about it, it only took me about an hour to make. 
This bench started its life as a headboard and footboard to two different beds.

I bought the headboard at the DI for $8. The footboard was donated by my awesome mom. The rest of the wood was scrap in my garage.

I started with cutting the footboard right in half and screwing it to the side of the headboard.


The footboard already had a notch cut out on each side, so I used that as the front of the bench, screwing a 2x4 to it.


I didn't have enough 2x6's to do the bench, but liked the look of them. So I decided to mix them with 2x4's.


Screwed them into the frame and TADA! Jackpot!


I lightly sanded and painted with my favorite color, Cottage White. I had planned on antiquing this after, but when I got it on my porch, I decided I like it just the way it was.


Well, except it needed pillows now.


Searching through the stash, I found some cute stripped material I wanted to use. And I was dying to use make a burlap pillow like the ones I've seen around blogland.

I bought a few pillows at the DI to use as stuffing, way cheaper than buying actual pillow forms.


I sewed the new pillows inside out around the old pillows so I didn't even have to measure anything. One of the burlap pillows I stamped with a stamp I've had for years and never used. I used chocolate brown to try to imitate those awesome coffee burlap bags. I then weaved the coordinating fabric through the bottom to tie it in.


On the other burlap pillow, I simply tied bow around. I'm not totally in love with the bow, thinking of making rosettes instead, but great for now.


I love this bench on my porch. I have gotten so many compliments on it. No one believes me that it only cost me $8 and that I BUILT IT!


Tuesday, July 27, 2010

Art Exchange Swap


You may have heard about the Art Exchange Project: Art Swap that is floating around the blog world at the moment. One of the cute ladies I follow was doing it and opened it up to her readers. I just participated in a Christmas in July swap (pictures to follow!) and was so excited to get my package in the mail. I figured this would be even more fun since you are supposed to get 36 packages in the mail! Woo Hoo! I love presents. I thought I'd open it up to readers on my blog and see if anyone would like to join up?

It is a never ending art swap...all you have to do is send 1 handmade package (it can be ANYTHING handmade) and you will receive 36 pieces of art in return! Sounds simple enough and I'm excited to see how it turns out - of course it will only work out if people stick to their end of the bargain, but even if I only get a couple of packages, that would still be exciting!

So...anyone out there want to join me? I need 6 willing participants - feel free to leave a comment with your email address or send me an email if you want to take part and I'll send you the details. If I happen to get more than 6 responses, I'll be sure to pass your details onto other people who are looking for participants.

Thanks guys :)

Hello?!? Anyone still there?


So my laptop was flung off my bed and smashed into the floor by a puppy broke about 6 weeks ago.
I feel like I've fallen off the face of the earth. Luckily I saved everything off the laptop and have a new one up and running.
Now to get back in the swing of things.

 
I'm so excited, we have 57 followers! I said I was going to have a giveaway at 50, and sometime while I was off the radar, I surpassed!
I'm working on a great giveaway and will post it later this week. I have tons of things to show you. While my computer was down, I was able to craft my little heart out.

 
First up: My darling niece's first birthday.


So of course I had to make her cute outfit to wear. This time I didn't try it on my baby boy like I did at Christmas.


I didn't take any pictures during the creation; I just made it up as I was going. I started with a white onsie. The top of the cupcake is that soft swirly fabric left over from a quilt. I also added ruffles to the sleeves. The skirt is pink tulle. I tied it in with a hem that matches the cupcake.

 
I also made her a few leg warmers. These were easy. I just bought girls knee highs, cut them and hemmed them.


Stay tuned for some exciting upcycling projects, an exterior home face lift and how to use old windows (so far I have 3 different projects!)


Thursday, June 3, 2010

4th of July Wreath & Decor

Did you see my guest post over at A Vision to Remember?

In case you missed it, here it is. 
This is what we did at our family craft night a few weeks ago.
(My laptop is in the shop!  All my pics are on it.
I should have it back this weekend and
then all new posts!  Also, I'm working on
a give-a-way as soon as we hit 50 followers!)


4th of July Rag Wreath


I know it's a little early to be working on 4th of July
decorations, every year July rolls around and
I have nothing to put out and no time
to get anything done

Besides, I REALLY want to start Halloween and Christmas crafts,
but it's too early to do that, right???  (maybe next month)


This was a very easy inexpensive project I came up with
for our family craft night.  We try to get together every few
weeks and eat food and craft.


I bought this fabric at Wal-Mart really cheap.  Each wreath was about $6.

If I were to do it again, I would go with more VIVID colors,
although this matches perfectly with my house,
my front door is a burgundy color, and
it doesn't stand out as much as I would like.


Snip your fabric every 1" and rip into strips.

Then cut the strips at 6".  I used about 1 yard
total, from 5 colors, for the wreath. 

Take some wire hangers and bend them round


Tie the strips around the hanger in a single knot.


Squish it together as you go and fluff later. 


This is my first attempt:


I was able to squish the strips together and fit a TON more fabric

Making it a lot FULLER.


I love how it turned out.  It took me about 6 hours because
of all the gabbing and eating.  Probably should have only
been about 1 hour.  But that's what makes
crafting so much fun, right!!!

BUT WAIT....THAT'S NOT ALL
If you do this craft in the next 30 minutes, we'll throw in this
Bonus Craft - Separate Shipping & Handling may apply
(Don't you love those commercials?!?
Even my kids always say "But Wait")

Fire Crackers
for your table


I cut a 2x2 into 4", 6", and 8" lengths

Paint, glue on wick, wrap and you done.

Great kid craft, neighbor gift, anything

My cousin's version:


Aren't they beautiful?  She's way more artistic than me.


Friday, May 28, 2010

Blog Swap with A Vision to Remember

I am so exciting to have
Bobbie visiting today.  She has a fantastic
blog.  You have to check it out!  Here she is
with a great tutorial:


Hello all you Mommy Time Craft Fans! I am Bobbie from A Vision to Remember
A Vision to Remember


I am so excited to be Blog Swapping today with Kerstin! First off let me introduce myself. I am a stay at home mom of 2 awesome girls and one dog. They are my inspiration for sure. Everything that I have made has been for them in some way. Here are a couple of things that I have made over at my blog: I love to make new clothes for my girls out of old clothes.I also made this fun Ribbon skirt for my daughter (Part 1, Part 2) I also have my own Etsy shop. There I sell rag quilts, car seat tents, and lots of patterns. Some of the patterns I sell are rag quilts, belly band, and fabric flowers. 
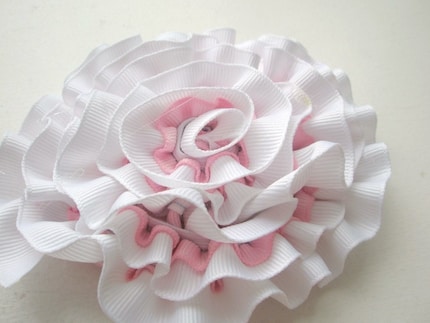
I also have many other tutorials on my blog. Make sure to stop by and check them out. 
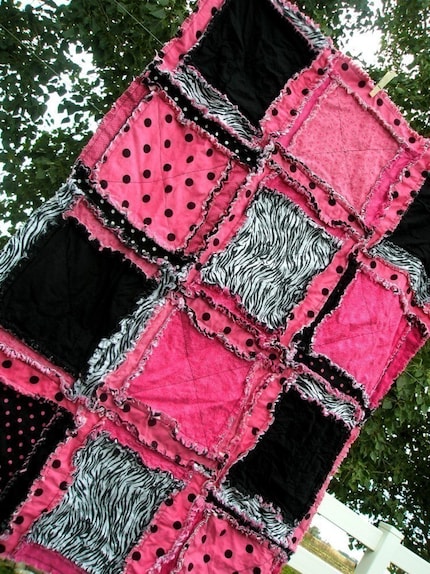
All the patterns are very easy to follow along and include pictures. Currently I have 4 different car seat tent and rag quilt patterns, a boutique ruffle blanket pattern, belly band pattern, and 4 flower tutorials available in my shop. Now onto the fun tutorial! Today I am going to show you how to make a fun and beautiful Pleated Headband 
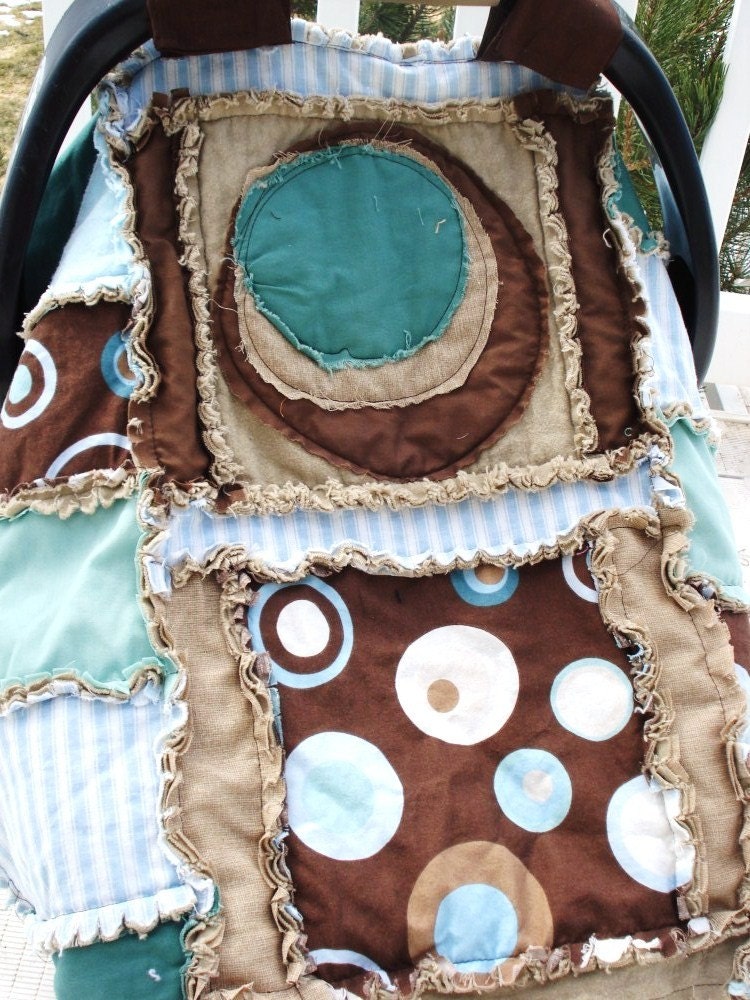
I love a pleated beautiful headband. Super easy to make plus it looks really great Heres how to do it: You will need a hot glue gun, a headband, ribbon (I used satin 5/8). I would use ribbon that is wider than your headband for a cleaner look Line the inside of your headband with ribbon Now start pleating the ribbon. Do it by hot gluing it down as you go. Then when you get to the end of the headband cut the ribbon about an inch. Fold it over hot glue to the inside of the headband. Look how awesome the headband looks. It looks great by itself. Or even better with a pretty flower Thanks for swapping blogs with me Mommy Time Crafts Remember to stop on over tomorrow for the fun party! Each Saturday I host a link party cause I wanna see all the fun stuff you have been working on.